Showing posts with label paper. Show all posts

Saturday, November 29, 2014

Pass the Page Kit Please - A Thanksgiving Tribute

2014 is quickly coming to a close.  It has been one of those years that I don't think I will miss when it is over.  There certainly have been some memorable events that took place, but between the craziness of work and family life, the focus seems to have been more about just getting things done. 

I am thankful that in years past I have always had time for my creative outlets - cooking, writing, photography and scrapbooking - but this year, my time was filled with other things.  One might say that I'm imagining it and that I still took as many photos as years past, or I spent plenty of time piecing together pages for the girls albums.  But I'm here today to tell you that's just not the case.

At the beginning of the month, I sat down at my kitchen table, the first time in a year, to start working on page kits that I purchased about a year ago.  My intent when the kits arrived was to do a page a week.  As you can guess, that didn't happen.

Halloween 2013
It was at that moment I realized that I wasn't making time for myself anymore.  I was so focused on work and my family that I briefly (or not so briefly) forgot that I needed to make time for myself.  I openly pledged on Facebook, that I was going to try and complete one album, a 2013 album of the girls, before the years end.  Now, for some of you that might not seem like a big deal, but for me it is a huge undertaking. 
 
In order to accomplish this task, I hate to say it, I'm not relying purely on my own creativity.  I have given into the time saving, lovely page kits that I have found on the internet and been able to order.  I am thankful that these kits exist, because without them, I don't think I would even have a chance to accomplish my goal for the year. 
 
To make the pages my own, of course I add pictures of my beautiful girls, age with inks, write personal notes and embellish with buttons and ribbons if the mood strikes me. I am thankful I have my beautiful family to photograph and I am still able to find time an hour or two a week to put these kits together.  But on some level it makes me sad that I just don't have the time to play with the paper combinations and make the pages work myself. 
 
The good new is that I'm well on my way to finishing a 2013 Sisters Album.   I have about six months covered and I have six more to go with five weekends left in the year.  
 
Sisters 2013
My goal is clearly set.  I will achieve it.  I'm looking forward to the new year, when I can carve out some me time and hopefully get some much needed time away for a scrapbooking weekend so that I can return to the paper crafting activity I love so much.
 
PS - I am thankful for my followers...for those of you still following.


Sunday, October 13, 2013

Books - Through the Eyes of a Child


I came home from one of my work trips to find my four year old had made me a book.

A Valentine's Day book for Mommy - by A. Myers 


I didn't really take a look at it until the next morning when I saw her working on another one.  Sitting at her art table, she was very carefully folding her construction paper in half, putting a straight line of Elmer's glue down the crease in the paper she just folded and then placing another piece of paper on top of it and repeating with the glue and another layer of paper.


A Sunday art project for Mommy - by A. Myers


While she was doing this, I was sitting in the kitchen with her trying to get caught up on a few emails.  Here she was working in the world of paper, and I was in the e-world.  Now of course this story would be better if I was saying that I was reading an e-book, but then, that would have been too perfect a fit for this blog.  But my point is, that even in this day and age where kids have access to so many electronic devises, including e-books and e-readers - which my daughter has - many of them still like paper.

From the very beginning with her, my husband and I made sure to expose her to the world of books.  We tried to keep her exposure to electronic devises to a minimum in the first year or two of her life so she would develop an age appropriate appreciation for books, which she has.  While she enjoys listening and following along to her books on my Nook and her Leap Pad, she still wants us to read a book to her every night before bed and likes "reading" her baby books to her baby sister in the morning.


But what I find most fascinating is her desire to create books.  Of course these two were for me, but she has created others.  One of them is a letter book where she practices her letters.  Another is her Hanukkah book - a place for her to put her Hanukkah wish list  and the other I'm not sure about, but it is definitely one of her creations.

Hanukkah wish list
She has alway been a creative soul, crafting with paint, beads, clay, paper, rainbow loom, and pretty much anything that you could find in a craft store.  But this paper craft is different than the others.  Not only is she taking the time to make the book, she is then going back and defining it, giving it purpose. While it is not always words on a page, it is her...her raw emotions, thoughts, creativity...right there in multicolor for all to see.  She has titles for her books and I document them so that both she and I can remember them after the years pass by.

I will encourage her to continue with her book making and hopefully over time, she will seek other ways to enhance her books, either through a different method of binding, starting to write stories in them or even using them as her own personal journals.

For now, they will be her simply created paper and glue bound books for her to paint, sticker and practice in.  And I will cherish them as they mark her creative milestones.

1 2 3 Paper books:

1 tube of glue
2 lines of glue
3 pieces of construction paper folded in half

Take the first piece of folded construction paper and put a line of glue in the fold.  Next take the second piece of folded paper, line up the folds and place the piece on top.  Then put a line of glue in the fold of the second piece of paper, line the fold of the third up on top of the second and place it down.  Apply a little pressure so the papers stick, but not to much that the glue pushes out onto the pages.  Allow to dry and then decorate.

Great craft for a 4+ year old.


Tuesday, September 24, 2013

Where is Mom? A Travel Journal

2013 has been another year of great change.  It seems like every decade, I make major decisions, usually for the better, that completely redirect my life.  This hallmark year is no exception.

In January, our family grew by one, with the birth of our second daughter.  In May, I made the decision to go back to the corporate world to plan meetings and events.  Don't worry, I still have my business for a little while longer, though I will probably be dialing back on the social event planning. I'm stilling selling invitations, stationery and other paper products and gearing up for holiday cards and orders.  In June, my oldest daughter spent her first year at big girl camp.  It was a great but exhausting summer for her! And now, as we head into the Fall, both my girls are in full time day care / pre-school so that my husband and I can keep our new work schedules - including my very heavy travel schedule.

You see, as a meeting planner I have found that most of my meetings are not around home.  I have been fortunate that many of my meetings have been on the east coast since taking this job, but as I grow in my position, I expect that will change.  While I am okay with this shift in my life, it has been a big adjustment for my 4 year old.  She has done very well so far, but I know she misses me and when I am home all she wants to do is spend time with me.

So to help her, and me, with all of my traveling, I have created a "Where is Mom?" Journal for my girls.  The goal - to have a fun way to follow mommy's travel by including fun write-ups about the places I'm going and keep post cards that I send the girls.  The purpose - to help them cope better with all the time I'm away from them and learn a little bit about the places I travel to.

The idea came to me when I was traveling for a meeting last week and decided to send my kids a post card from the "Windy City".  I figured it would be a great way to let them know I was thinking about them and who doesn't love to get mail!   But what to do with them once I got home?  I know, put them in a binder, no better yet a journal.

So Sunday night, I got out my cricut and some paper and cut out letters to title the journal.  I used my Micky and friends cartridge and cut out 1 1/2 inch letters in caps and then affixed them to another piece of card stock.   I put some of my travel scrapping stickers on to enhance the cover.  Then I slipped it into the front of a three ring binder to create the cover.  Next I put in about twenty acid free sheet protectors so that I had clear pockets to put the postcards.   I typed an introductory letter to my kids and put it in the first page protector for them to "read" or rather for me to read to them.  I used regular printer paper, comic sans font and blue ink to keep it kid friendly and fun.

Finally, to make it more than just a place to keep post cards and make it more of a journal, I typed up two journal entries, one for my trip to Chicago and one for my trip to Boston.  In the journal entries I included a map of the state with a yellow star for where I was, some kid-friendly interesting facts about the city I was in and dated them so they can keep track of my travels.

When I presented it to my 4 year old the next day she was so excited.  When I took her to school, it was the first thing she shared with her teacher and when she got home that night, I was already on my way to my next destination, my husband sent me a text message from my daughter that said "daddy I love my journal".

I hope to be able to continue this great project.  If you are a parent who travels a lot for work, feel free to try this, especially if you have little ones at home who miss you.  It's a great way to keep them involved, keep them present and make them feel more comfortable with you being away.


Friday, September 21, 2012

Elegant Seating Cards for a Fall Wedding

It has been a while since the Paper Princess has posted to her blog.  Let’s just say life has taken over my ability to sit down and write for fun during the last year.  I know I’ve been extremely lazy remiss. 

For those of you who are still following me, I’m pleased to let you know, that I have made it my goal to try and write at least once a month, to get my creative juices flowing again, and also to share some of my more recent paper creations for both work and pleasure. 

To kick off my Fall goal, I would like to share my latest work project.  As many of you know, part of my event planning business entails working with clients on their event invitations, personal stationery and other printed accessories for their special occasions.  This summer, I was fortunate enough to work with a wonderful client on her wedding invitations – a beautifully embossed invitation on ivory stock with mocha ink. *


The client loved them and was thrilled with the response she received from her guests.  She wrote “I have gotten such great feedback on my invitations.   My guests love the wording.   You did a GREAT job!!  Thank you for all your help.”
As a result, I received a follow up communication from her, asking if I had any place cards that might match her invitation.  She had purchased basic place cards from somewhere and didn’t think that they were “elegant” enough for what she was looking for.  Music to a small business owners ears – we love repeat clients!

I sent her some options from the same company that she ordered the invitations, but she just wasn’t feeling that “crazy” over any of them and was looking for “a[n] ivory colored card, something simple, but elegant.” And then she thanked me for trying.  But I wasn’t ready to give up on helping her. 
I had a flash of creativity and what I thought was a pretty good idea to solve her problem, I could custom design/make them for her.  Here is what I wrote: “M[a]y I make a suggestion?  We could get ivory card stock, print your guests name in mocha ink, in a font you like, and cut them into a 2x2" square. Then we can take those squares and put them in gold or silver place card holders that will stand up elegantly on a table. The guests can then take the holders home and use them to hold either notes or small pictures.  Also, if we make them a little bigger, we might be able to blind embossed the side of the card to make it look similar to the invitation.”

She was game.  I did my homework on what it would cost to make them and prepared a quote for her, submitted it to her and she was on board.
As part of the process, I prepared a few samples for her so she could select which embossed border and location of the border she like most.  Below is the final product. *


I have to say, it was a fairly easy project and of course I only had to make a total of 35 for this very small and intimate wedding.  It just took a little time, thought and creativity to create these wonderful seating cards for my very happy client.

Congratulations to them on their wedding!  Thank you for allowing me to be a part of your special day. 
*Client name used with permission from the client.

Wednesday, December 21, 2011

I've Got My Hanukkah Gifts, Now What Do I Wrap Them In?


A friend and fellow blogger challenged me to write a blog article this season for #hanukkahhoopla - an opportunity for those of us of the Jewish faith to blog about Hanukkah this holiday season.  She thought it would be fun for me to write something about paper and how it ties into Hanukkah.  Well, in my world there are two ways - wrapping/gift paper and scrapbook paper.


I think it would be more fun to talk about wrapping/gift paper since it is the season of gift giving and figuring out what to wrap all those presents can be a challenge, especially when 98% of the wrapping paper out there is red, green and decorated for Christmas.  (No offense to my non-Jewish friends, family and colleagues - I get it and respect it.) 

So I purchased all my presents and checked my supply of wrapping paper - OUT!  I guess I forgot to pick some up at the end of the holiday season last year when it was all on sale.  So I went to my local bulk club retail store.  Guess what, they didn't have any.  Next stop was my local craft supply stores and all I could find was one or two different pattern bolts to choose from along with clear, blue and silver celophane wrap and plain paper.  They also had bags that were blue and white, blue and gold and other Hanukkah themed colors, but nothing that really stood out.

I wanted something more unique and not necessarily from the Hallmark store or Toys R Us,  so I checked out following places - The Container Store (and if you don't have a store near you try http://www.containerstore.com/shop/giftWrapWonderland/chanukah?N=74655&Nao=0 and Paper Source.  They had nice options, but I wanted something a little more personal.  I thought why not try making my own. 

So here is a quick and simple way to make your own wrapping paper.  If you have brown paper bags from the grocery store (which most of us do), Hanukkah stamps and stickers you have the perfect beginnings of your own green, unique and personal wrapping paper.  To begin, cut the bags down the side and open them up .

Then take any Hanukkah stickers (or stamps) you may have from either your scrapping/craft collection or if you don't have them you can generally find them at a local craft store or online if you search Hannukah stickers and stamps, and randomly place them all over the paper.

When you're done you should have a colorful, homemade piece of wrapping paper that is both unique to you (and or your child) and on the enviornmentally friendly side.  If the box or gift is bigger than a large grocery bag, don't be affraid to tape two or more bags together to make it fit your gift.

If you don't have brown paper bags, you may want to try tissue paper.  My daughter came home with a Hanukkah present she made for us at school and they used tissue paper instead of brown paper bags.  It was really cute.


They even made the card from a piece of construction paper die-cut into a dreidel. 

When you're finished wrapping the package, you can finish it off with blue, silver or gold bows and ribbon.

This is just one way you can create personal and unique wrappings for the perfect presents you spent hours trying to find.  I'm sure many of you have other creative ideas that incorprate paper.  I'd love to hear about them. 

Also, I hope this has inspired some of you to go out and try something a little different this year when wrapping your gifts.  You can even get your children involved - have them decorate the paper and then use that to wrap any presents they maybe giving as gifts to their friends, parents, grandparents and/or teachers.  I'm sure the gift receiver will probably love it.  I know I did.

By the way, #HanukkahHoopla would not be possible with out the generosity of our sponsors.  I would like to thank Streit's and Doni Zasloff Thomas a.k.a. Mama Doni, the lead singer/songwriter of The Mama Doni Band for providing each of the 16 bloggers involved in #HanukkahHoopla with a little cyber-swag. Their cross-promotional alliance is designed to celebrate Jewish culture with the young generation, a mission of both Mama Doni and Streit’s.

How can you win?  Leave me an awesome comment on.  On January 5, 2012, I will select one winner at random.  Be sure to subscribe to my blog or subscribe to the comments on this page so that you can find out if you are the winner!  If I don't hear from you with 48 hours after announcing, I will select another winner.  Please don't make me work hard to find you.

Prefer to be contacted via Twitter?  Leaver your Twitter handle in your comment and I will tweet you if you win.

Not interested in winning?  You can still leave a comment!  I love to read your words.  Just write: "No prize necessary" in your comment.

Thanks for reading and I look forward to your comments.

Happy Hanukkah!

Saturday, December 3, 2011

Learning my A, B, C's and 1, 2, 3's

The other day I was shopping for some new educational toys for my daughter as a Chanukah present.  In particular, I was looking for flash cards with just numbers and letters (no words or associative pictures).  Ever since she was able to sit up, focus on things and play with toys, she's had a particular facination with flash cards.  When she was just an infant, she would grab her animal flash cards out of my hands and sort through them all by herself.  I would try to read them to her, but she insisted on looking at them by herself.  Today, she knows every animal and toy on every card and I swear she taught them to herself.
Anyway, I figured, if she could learn all the animals by flash cards, then perhaps it might be the best way for her to learn letters and numbers.  She can sing the "A, B, C" song beautifully, and she has the magnetic letters that we play with in the tub as well as books with letters and words to associate, but she isn't quite grasping them.  We also have electronic toys to reinforce, but she's really not into playing with them either.  So I figure, why not try the old fashion paper way - the flash card approach?  It worked with the animals.

Well, imagine my surprise when I went in search of what one would think to be a common item, I had a hard time finding just plain cards with just letters and numbers.  I went to the usual suspects, and none of the stores had what I was looking for.  Sure they had alphabet and number flash cards


- fun and colorful - attractive to a child's eye.  But they all had too much going on.  The closest thing I found was this pack of number flash cards - 1-100.  Just straight up numbers on a card - no words, no images to associate - exactly what I wanted, until I took one out of the box and realized that my daughter would destroy it in about 2.8 seconds.  The cards were fairly lightweight and really designed for an older child.


So, after much thought and debate, I dove into my paper reserves and decided to make my own.  Through the use of my Cricut and Plantin Schoolbook cartridge, I was able to make bright, colorful, yet simple flash cards for the numbers 0-10 and the alphabet.  I cut 3" numbers and letters out of cardstock and mounted them to double matted plain card stock in coordinating colors.  Once the adhesive was dry, I ran them through my laminator.  The heavy weight of the paper plus the lamination, should make them sturdy enough to withstand the abuse my daughter will put them through as she learns her a, b, c's and 1, 2, 3's.

Friday, June 10, 2011

The Power of Paper

Last month I went on my annual pilgrimage to the National Stationery Show in New York City.   This year's theme - Paper Power. 
Imagine, over 500 exhibits of the latest in wrapping paper, journals, paper products, note pads, note cards, invitations and stationery.  Their mission, to give people the ability to use paper a means of or for expression for just about any occassion.  Simply aisles and aisles of cotton fiber papers, recycled papers, cardboard and acrylics (okay that’s not paper, but some of them could pass as they were paper thin) all featuring the latest colors and patterns of the year.
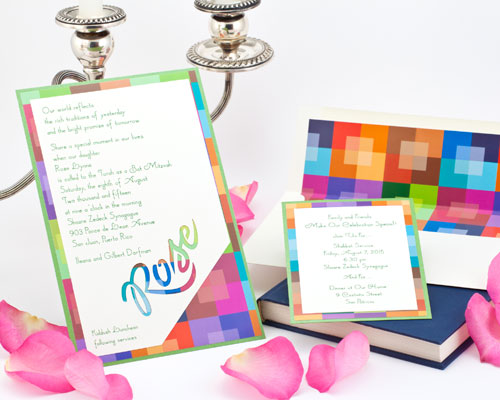
My mission was twofold, one to visit with my suppliers and two, to see what was new in the paper and stationery world.  I had less than eight hours to complete my mission with a lot of ground to cover.  So I changed up my strategy for walking the floor.  Unlike last year where I started with the first aisle, this year, I went right to middle where most of my current suppliers were stationed.   I met with the my sales reps and introduced myself to those who only knew me by phone.  It gave me opportunity to engage in informative and educational conversations about the new invitation/stationery books they were putting out for this year.   As a result, I picked up the new Betsy Hall Stationery book from McPhersons which arrived last week.  Saw what new things are coming from C’est Papier this year and picked up the new Bar/Bat Mitzvah Album from Pioneer Announcements – one of my best selling invitation lines.  It just arrived and I’m so excited!   
 
Bat Mitzvah from Pioneer Announcements

The last stop on the first part of my mission was to check out Checkerboard – a company that I had been thinking about opening an account with – and finally did.   I perused the current and new albums for 2011/2012 and finally decided to order the newest Bar/Bat Mitzvah album from Checkerboard.  It should be arriving sometime in the fall. 
The first part of my mission was complete.  It only took me two hours and still gave me plenty of time to walk the floor for fabulous new finds. 
So with the six remaining hours, I cruised through the aisles working my way from the last aisle to the first.  I met some new exhibitors – not just new to me but new to the show.  Saw the most exquisite hand crafted invitations in today’s most popular color – honeysuckle.  Picked up four new lines of invitations including – Mosaica, Birchcraft, Checkerboard, and Tag & Co.  And I discovered two new journal suppliers both of whom will be perfect for feeding my journal paper habits. 
Out of the Mouth of Babes
The one company I’m really excited about, Journals Unlimited, has a great line of products called “Write it Down!”   The journals come in three different sizes and colors, are the perfect under $20 gift, come in over 60 titles and I can even customize them!  Inside, those that have titles other than Blank Journal, have designated areas for you to put the information you want to record - spaces for dates, favorite memoires, times, locations, etc.  For those of you who are into scrapbooking and are always thinking about keeping a journal to capture the words to go with the pictures, they have the perfect journals for just that purpose. 

Wedding Planner

There is  Vacation – A Traveler’s Journal, Out of the Mouths of Babes – for those kid quotes you’ve always wanted to capture, but didn’t, Birthday- The Birthday Journal, Memories – Our Family Journal, and Kid Stuff – My First Journal.  If you’re a planner like me, they have the Wedding Planner -My Wedding Journal and Day Planner – My Planning Journal.   These are just a few of their many relevant and creative titles.  I will have some available by the end of the month if you are looking for a new Journal!


After a long day of processing the power of paper, I was completely satisfied and fulfilled my mission.  Looking forward to next year's show and I hope my new paper finds for this year will be as exciting to you as they are to me. 

Monday, May 30, 2011

Two Peas In A Bucket

I can't believe it, but for the first time this year, I actually used my scrapbook tools, papers and photos to scrapbook.  I did my first two pages of the year and here is the one that I actually completed. 


The pictures are from November 2009 and it was my daughter's first trip to Adventure Aquarium in Camden, NJ.  The papers I used were from Embroidered Papers and Cosmo Cricket.  The Embroidered Papers was a ready-to-use kit I picked up at either a CK Convention or a Scrapping retreat back in the day when I was scrapping a lot of skiing trips.  As it turned out, the embroidered design on the paper looked a lot like the coral reefs in the tanks and worked perfectly with the photos.

The fish paper is from Cosmo Cricket.  The actual paper title was Snorkel: School's Out and the second side was More Fish in the Sea.  Again, I don't exactly remember where I picked up this paper, but I purchased it in late 2009 or 2010, after I took these pictures, with the full intention of using the paper for this trip to the aquarium.

With a little creativity and some added embellishments, I was able to create a nice layout for her first year scrapbook.  Hopefully I'll be able to continue to work on it over the summer and will post some of my better paper pieces for you to see as I go along.

Earlier this week, I re-posted an article from my friend Kim's blog.  As a result, I got an interesting inquiry from another friend of mine who wanted to know where she could find good scrapping supplies in our area (southeastern PA).  Unfortunately, a lot of the independent scrapbook stores in our area have closed over the years.  They haven't been able to keep up with the bigger craft stores.  However, I remembered there was a store that is fairly local to me opened for a while, then closed its retail shop in favor of its online store when the recession hit.  Today, when I went to check if they were still operating their online site, it said they had reopened their retail location.  I wish them the best of luck and hope they continue to do well!

But for those of you who are comfortable buying online, I came across.

This online store is amazing.  It is well designed.  They offer great products and have everything for traditional paper crafters as well as digital crafters.  They even have online classes and video workshops/demonstrations that you can watch for free. 

So if you're in need of a new place to shop for paper, please check out Two Peas in a Bucket.  Click here if you would like to subscribe to coupon deals for Two Peas in a Bucket and watch my blog for updates and specials.

Thursday, May 26, 2011

Escape into Scrapping Fun!: Win a FREE Echo Park Paper Collection!

This is a re-post of my friend and fellow paper lover, Kim Sheller's Blog.  She is the Owner of Creative Expressions Scrapbooking Escapes and is running a contest through tomorrow.  She's currently trying to decide which Echo Park Paper Collection to order. 

The Paper Princess has already weighed in on this and now it's your turn!

Visit the link below, help her decide and be entered to win a FREE Echo Park Paper Collection.

Escape into Scrapping Fun!: Win a FREE Echo Park Paper Collection!: "Echo Park Paper Company is one of my new favorite paper lines! It is so fun, bright & cheerful! But I need your help... I want to order some of the collections to have on hand at the weekend escapes and the online store.  Problem is, I just can't decide which ones to get.  So I am asking for YOUR help!  For all who comment on this post or the facebook post, you will be entered to win a FREE Echo Park Paper Collection when I place the first order!  


Please leave a comment below by Friday, 5/27 with your favorite collection and why.  You could be the LUCKY winner!!!  I will announce the winner after the holiday weekend on Tuesday, 5/31.


Thanks for participating!!!  I appreciate it :)

Wednesday, May 18, 2011

"Comic"al Decor

I found a really great way to transform old paper into special event decor.  This past weekend I had the pleasure of working on a client's Bat Mitzvah where we incorporated the Sunday Comics into the theme.  It took a little vision and creativity to make it work, but once I had it figured out, executing it was pretty easy.
The Goal:
Incorporate the client’s love of the Sunday Comics into her décor.
The Challenge:
Doing it without violating copyrights.
The Solution:
Order a licensed poster for the sign-in board and mount it to poster board.  Add a title and the date with assistance of coordinating paper and my Cricut machine.
Place cards made of recycled Sunday Comics from the past year.  Friends and family of the young lady being Bat Mitzvahed collected the comics from October through March which I cut into 4x6 sizes, laminated , folded and then labeled with clear labels with seating assignments.
It was a great way to bring a "green" aspect into the event planning process as well as incorporate one of her favorite things.  Who knew old Sunday funnies could have such a great second life?

Table Numbers made of recycled Sunday Comics.  In keeping with the place cards, I laminated 16 additional comic clips and numbered them.  I then attached them to Lucite sticks which we were able to plant in the centerpieces.
The Result:
A really cool and colorful way to do place cards, table numbers and a sign-in board while recycling the Sunday Comics.

It was pretty easy to do, it just took time.  You can do this with any old paper - wrapping paper, old coloring books, cardstock, patterned paper, journal paper and other type of paper you can think of. Check out the Ideas section for instructions on how to make the place cards and table numbers.


Wednesday, May 11, 2011

Paper Princess's Paper Picks and Tricks

I just finished reading my May/June Paper Craft Magazine.  It was mostly about making cards for Mother’s Day and Father’s Day.  However there were a couple of things that I thought might be of interest to share with you. 
New Collection!  BasicGrey, one of my favorite paper companies, was advertising its new collection of papers - Life of the Party.

It looks like a really great line that will be perfect for scrapping your favorite party photos.  I’ve been able to find it on occasion at various A.C. Moore Stores and random craft supply stores in my area, but it’s been hit or miss for the most part.  So, since I have a business that lends itself to carrying craft papers and fabrics, I’m working on opening a retail account with them.  Stay tuned for more information on availability.
Cards, Cards and More Cards.  This issue focused mainly on card crafts for May and June.  Since Mother’s Day had already passed, those cards weren’t as appealing to me as the ones for Father’s Day.
  As I was looking at the cards, I realized that I actually have this paper sitting in my paper stash.  While I won’t be making this card, it gave me some ideas for future scrapbook pages.   If you would like the instructions for the card though, visit http://www.papercraftsmag.com/articles/Walkin__Boots_Card.


They also provide ideas for teacher appreciation cards.  If you are looking to do something special for your child’s teacher(s) this year, consider making a homemade card.  Anyone can buy a ready-made card, sign it from you and your child and send it into school.  If that is all you have time for, that’s great. I’m sure your child’s teacher will be most appreciative. 
However, if you have a little more time, consider making a homemade card with your child.   If you’re a scrapper, card-maker or crafter, then you probably have the materials around to create a card.  If you don’t, there are plenty of online resources – like www.papercraftsmag.com and www.marthastewart.com that have pages and pages of templates, lists of supplies and tips for creating that perfect card. 
One of the things that I’ve been encouraging my daughter to do is be creative.  While she may be too little to cut out the patterns and write the actual sentiment for the card, she is not too little to paste the paper and embellishments together.  She and I can sit for an hour or more, working on paper projects together.  For cards, I will cut or fold the paper for her and then give her stickers, kid-safe/friendly markers and other embellishments to use to decorate the card.  If you don’t want to write in the card and your child is too young to write, try giving them appropriate sentiment stickers to stick in the card.  Don’t worry if they are upside down or catawampus, that’s part of the charm and makes the card unique to them and their personality.
If you don’t have scrapbook paper or craft paper lying around, but you have loads of “art” projects from school, consider using one of them to make the card.  It’s a great way to use something that your child made and give it new life instead of making its way into the tired art portfolio or the ever loving recycle bin at the end of the year.
If you’re child’s teacher has been encouraging creativity in the classroom they will love the specially made card just for them.  Who knows, they may even keep it as a memento.

Monday, May 2, 2011

Sad Stacks and Left Over Paper

If you're a scrapbooker like me, you may have quite a few partially used blocks and stacks of scrapbook paper that you thought at one time were perfect for your project or album.  As it turns out, the paper didn't quite coordinated with the photos you were scrapping or you never got to use it and now you're done with the album.  The paper is just sitting in a your organizer, taking up valuable space, getting dusty, fading, and lonely.

So what's a paper lover to do?  Well, here are a few ideas of how to put that sad stack of paper to good use.

1.  Got Kids?  Give it to them.  Let them get creative with it.  Everything from making their own scrapbook pages to paper arts 'n crafts projects.  If they are too young, sit down and do a project together with them.  There are lots of great craft ideas online.  Download templates and instructions if you need too. 

This past fall, I found some faded orange and black paper.  I sat down with my daughter, who was 18 months at the time, and together we made paper pumpkins for Halloween. We added some details with black markers and crayons and presto we had jack-o-lanterns.


I then found some paper in my Old World Stack.  It was an antique brown paper with a design I knew would never coordinate with anything I would scrapbook in the near future.  I drew leaf patterns on the white side and cut them up.  I gave them to my daughter to crumple them up.  She loved it!  Next we took a  little walnut distressed ink and stickles.  With in minutes we made fall leaves to go along with our jack-o-lanterns.  Then we took them and decorated the windows.  We both had a fun and it was a great way to use up some left over paper.  Note - always make sure the little ones are supervised with scissors and any materials that may destroy your furniture, walls, and/or carpets.

2.  Paper swap.  What's old and unusable to you, may be new and perfect for someone else.  Compile a pile of coordinated papers from your stack (if you can swing it 2 of each paper) and make-up a couple swap kits.  Then the next time you are with your scrapping friends see if they would be interested in swapping papers.  It's a great way to rotate your inventory without spending money.

In the past when I've been on my scrapping retreats, we often have a share table.  We take out papers that we don't want and put them on the table for others to use.  I know I've put out some of my leftovers and have definitely picked up a few that have helped me with my albums.

3.  Donate it.  If you don't want to use it for your own projects or the paper is not perfect for a scrapbook, then consider donating it to a local pre-school or daycare.  I know they are always looking for art supplies and any donated materials are always welcome.  Just check with the person in charge to make sure they can use it or before you drop it off.  The last thing you want to do is have them throw it out.

Of course there are many more things you can do with that paper.  If you've got a favorite idea, please feel free to share it!  I'd love to hear what you do with your paper.

Tuesday, April 26, 2011

Welcome to the Diary of a Paper Princess

I am a work-from-home mother who specializes in raising a daughter, being a wife, selling invitations and stationery and planning special events for others.  In 2007, I left the security of a paycheck, with the passion to start my own business, the desire to work for myself and the dream of creating a balanced world where I could be a mom, a wife and a professional.  Today, I have a successful small event planning business with a blossoming invitation and stationery clientele. 
When I'm not busy planning special events and social occasions for others, you can find me with my family.  I generally have a camera in hand looking for that perfect photo op.  By the way, did you know that the top and back of a 2 year olds head is great subject matter?
One of the things that I've developed over the years - partly because of my business and partly because of my scrapbooking hobby - is a passion for paper.  I love looking through my inventory, going to the National Stationery Show to see what's new, helping customers pick the right colors and papers for their special order and even taking the time to find the right paper product for my personal needs. 
My guilty pleasure is going to the craft and paper stores.  I can stand for hours (when I have a few) in the paper isles, searching through all the new patterns, checking the quality of the solid stock and feeling the new textured papers.  While I may always gravitate back to some standard color schemes and solid card stocks, I'm always on the look-out for that unique pattern or textured paper that just might do the trick when you have that one photo you just don't know what to do with.
I hope you will join me on this paper-passion journey where I will share my views on what's hot (and what's not) in papers for all your paper needs, deals on invitations and stationery, tips on what to do with outdated papers, ideas for paper crafts and any other paper inspired idea may come to me at 3:00 am in the morning.